
What is kimchi?
Tangy, bold and spicy, kimchi is a traditional, fermented Korean side dish typically made with cabbage and other vegetables, often including ginger, chili, and garlic. Kimchi is incredibly nourishing especially when uncooked, it can restore the gut microbiome due to its probiotics, and it makes a flavourful side dish or condiment, versatile in many recipes.
No joke: I went through a kimchi obsession which I genuinely believe helped me stay afloat in my depraved party animal college years, and it played a role in reducing and eventually eliminating my refined sugar cravings. It was only recently when I finally felt called to make a batch of my own, and I’m happy to report that it’s a pretty darn easy process that can take less than 20 minutes.
You’ve probably heard by now that the gut microbiome is one of the MOST vital factors in physical and mental well-being, and in fact, daily intake of diverse live biotics in food sources is pretty much REQUIRED for optimal survival in this day and age. Unfortunately the majority of probiotic supplements and shots are scams that do not provide a diverse enough spectrum of live biotics. Homemade kimchi is a great and easy way to stick to food sources, it is a gut-healthy superfood packed with diverse probiotics, nutrients such as vitamin B6, vitamin C, vitamin K, folate, iron, and riboflavin, and other massive health benefits including powering up the immune system, mental well-being, digestion, and the regulation of cholesterol and blood sugar levels. Because of its nourishing probiotics, vitamins, minerals and antioxidants, it can make a great tasting and inexpensive addition to a dietary arsenal when it comes to dealing with modern culture’s oversterilized, imbalance inducing, indoor, sedentary lifestyles. Fermented foods stimulate defensins and other immunomodulatory peptides which enhance the immune system and improve immune tolerance. The fermentation process also develops a plethora of additional nutrients that are more easily assimilated and bioavailable to the body.
Kimchi is pretty much synonymous with Korean cuisine today, and particularly within the past decade it has become quite popular among Western cultures for good reason. It tastes great and adds a vibrant flavour to any meal you could imagine. By making your own, you also get to use organic, pesticide-free, fresh ingredients and avoid the plastic packaging and chemical leaching from stale store bought versions. Homemade also just tastes better, it’s fresher, and it gives you full control over what goes into it, with no funny business like additives in table salt, questionable chemicals, or factory farmed fish paste.
From various studies, consumption of kimchi is linked to protection from some types of cancer, inflammation, the common cold, skin conditions, digestive issues, constipation, and supports gastrointestinal health, heart health, and mental well-being. Certain probiotic strains have also been shown to reduce the frequency of fevers, colds and flus, so adding probiotic foods to your life can provide awesome additional immune support. In 2018, researchers have even found that it has been effective at preventing and killing the influenza virus. Don’t take my word for it though, try it for yourself.
Lactobacillus plantarum, which is produced in large quantities during the fermentation of kimchi, and its sub-ingredients such as green onion and ginger are thought to hinder the growth of influenza virus. We concluded that bioactive compounds from lactic acid bacteria produced by kimchi fermentation serve as antiviral agents by affecting the virus membrane surface or promptly activating immune cells’ mobilization.
Dr. Kim, In-Ho of Korea Food Research Institute
Kimchi was invented long before refrigeration became a thing. In Korea, winters are freezing cold like in Canada where I live, with few fertile plains, making food preservation during the cold months a priority before the impact of globalization and modern methods of food preparation came into play. When early Koreans started an agricultural lifestyle, they would consume salted, fermented vegetables to aid in the digestion of grains which consisted of barley and millet at first, then eventually rice. Food preservation became an art, along with other condiments such as soybean paste (doenjang) and soy sauce (ganjang).
Early kimchis (approx. 57 B.C.E.—668 C.E.) were much different than what they usually contain now, mostly with radishes dipped in paste or salted in brine. There was no red pepper, and cabbage was not often used. Eventually pine mushrooms, cucumbers, eggplant, Indian mustard leaf, wild leeks, bamboo shoots, garlic, spices, fermented fish and the famous red chili and Chinese cabbage found their way into kimchi pots, often pickled in brine, soy sauce, or soybean paste and served as a side dish during winter. Nowadays tongbaechu kimchi (first invented after 1800 C.E.) is the most iconic version with its glowing, bright red chili pepper and cabbage, and often includes fish or shrimp paste.
This would be my #1 food to consume in the event of a power outage, pandemic, or apocalypse as it stays edible for a very long time. Traditionally it was stored in jars underground, and you can even freeze it if you like.
How to make homemade kimchi with daikon and scallions:
You’re in the driver’s seat, don’t be afraid to get creative. There are as many variations of this Korean classic as there are individual tastes, and this is my interpretation using local ingredients that I can access where I live. Use ingredients that you can find near you, the farmers’ market is probably where you’d find the best quality, grown close to you. You can use different varieties of cabbage or apples that grow in your region. Go wild.
- Rinse and slice up your veggies, then massage them with sea salt in a large bowl for 3-5 minutes until they shrink
- Blend the pepper paste in a food processor fitted with the “S” blade or a good blender
- Stir the pepper paste with the veggies for 3-5 minutes to allow the mixture to soak up the sea salt
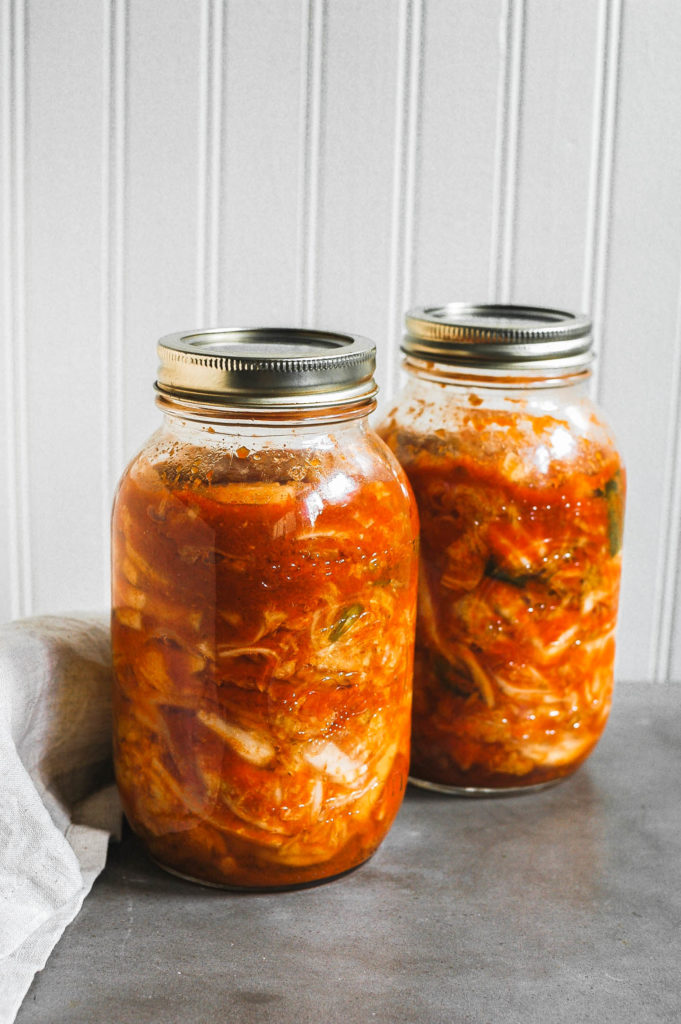
- Tightly pack the kimchi into the jar and remove any air bubbles until the red liquid line comes above the cabbage to kickstart lactic/anaerobic fermentation
- Ferment the kimchi in a cool, dark place for 3 to 21 days, according to your taste preference and depending on the environment’s temperature. You can taste test it once a day to see how it progresses. I like it really pungent and potent, so sometimes I leave it for up to 2 weeks without the need for taste testing. If you leave it to ferment for a very long time (2-3 weeks), it will age well, become pungent, and eventually lose its crunch, but will still remain edible. You can slow down the fermentation whenever you like by storing it in the fridge for 6 months for optimal freshness, and up to 1 year. If you prefer to age it well and have it lose its crunch, you can use it in a stew like kimchi jjigae.
- Bubbling, bulging, a sour taste, and softening of the cabbage are all perfectly normal for kimchi, but if you notice a foul odor or any signs of mold, such as a white film atop the food, the batch has spoiled and should be thrown out (luckily it is relatively inexpensive to make). You’ll know if it smells off. Sometimes kahm yeast will form on the surface, but it can be scraped off with the rest of the batch remaining edible.
Use a glass mason jar, fido jar, or glass/ceramic fermentation crock of your choice to ferment and store the finished kimchi. Mason or fido jars (affiliate links) are invaluable tools when it comes to home fermentation as they’re incredibly versatile and inexpensive. Always use a clean utensil when taking kimchi (or any fermented food) out of its jar to avoid contaminating the contents and disrupting the fermentation process.
Tips to make homemade kimchi with daikon and scallions:
- Use clean equipment, never made out of plastic. To easily sterilize equipment, I like to boil a kettle of filtered water and carefully pour some into my cleaned mixing bowl (never plastic), and mason jar after they’ve first been washed with a non-toxic dish detergent such as Dr. Bronner’s (affiliate link, I truly love this stuff for regularly washing dishes). Then quickly swish it around so the hot water eventually covers the whole inner surface area and removes any bad bacteria that may come into contact with the kimchi and disrupt the fermentation process. After this, I transfer the water to another glass or bowl to reuse for other recipes, make a tea, or to water plants, and avoid wasting the water.
- Add organic local miso and tamari to your pepper paste for a burst of umami flavour, if you like. 1 tbsp of each will suffice for this recipe.
- Pack down the kimchi firmly before fermenting so that no air bubbles remain and the vegetable mixture gets submerged in the liquid.
- Store it in the fridge after it has fermented to your liking for up to 6 months or more. This slows down fermentation, too. I’ve had a huge batch for 6 months, still going strong! If you find any yeast or mold on the surface, simply scrape it off as the rest of the batch should be fine to eat. You’ll know if it has gone bad, it should taste acidic but not like it has rotted.
- Wear gloves if touching the pepper paste with your bare hands. If you use your bare hands before touching your face or eyes it will burn! I usually just stir the mixture thoroughly using a silicone spatula.
- Use wild caught fermented fish or shrimp only if you choose to try it in this recipe and if you can access it. Not only does wild caught seafood contain fewer toxins and more life energy, but they will not have been farmed in terrible conditions.
- Halve or double this recipe if you want to make more or less. I highly recommend making a larger batch to last you many months. This recipe makes about 2 large mason jars, or about 3 cups.
- Use a glass mason jar or glass/ceramic fermentation crock of your choice to ferment and store the finished kimchi. For me, mason jars are a MUST when it comes to home fermentation as they’re incredibly convenient and inexpensive. Always use a clean utensil when taking kimchi (or any fermented food) out of its jar to avoid contaminating the contents.
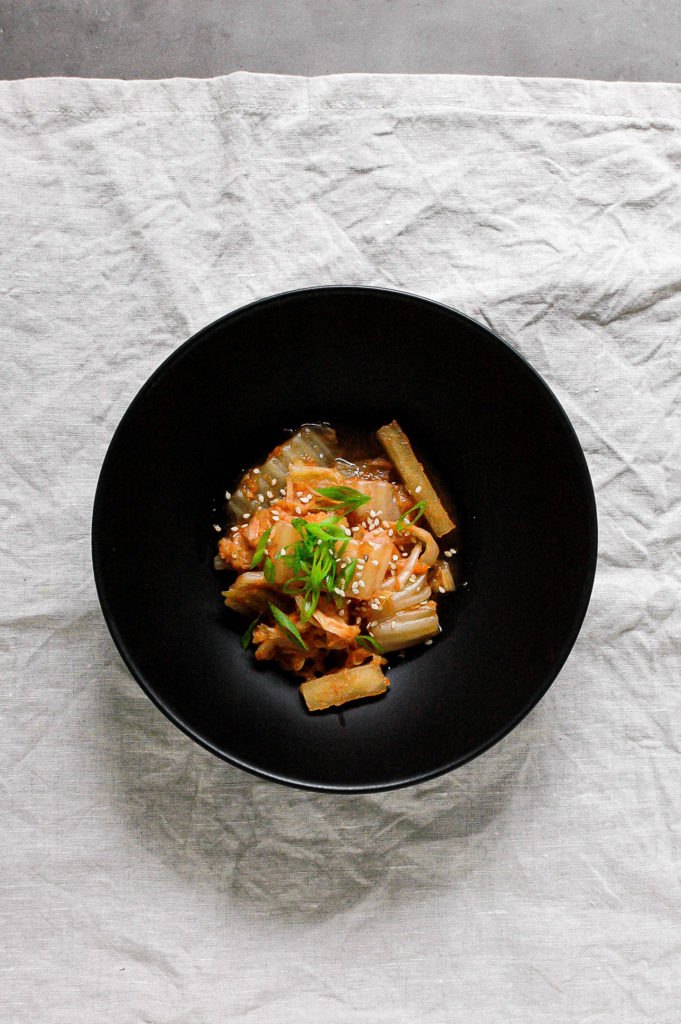
Kimchi with Daikon and Scallions
Ingredients
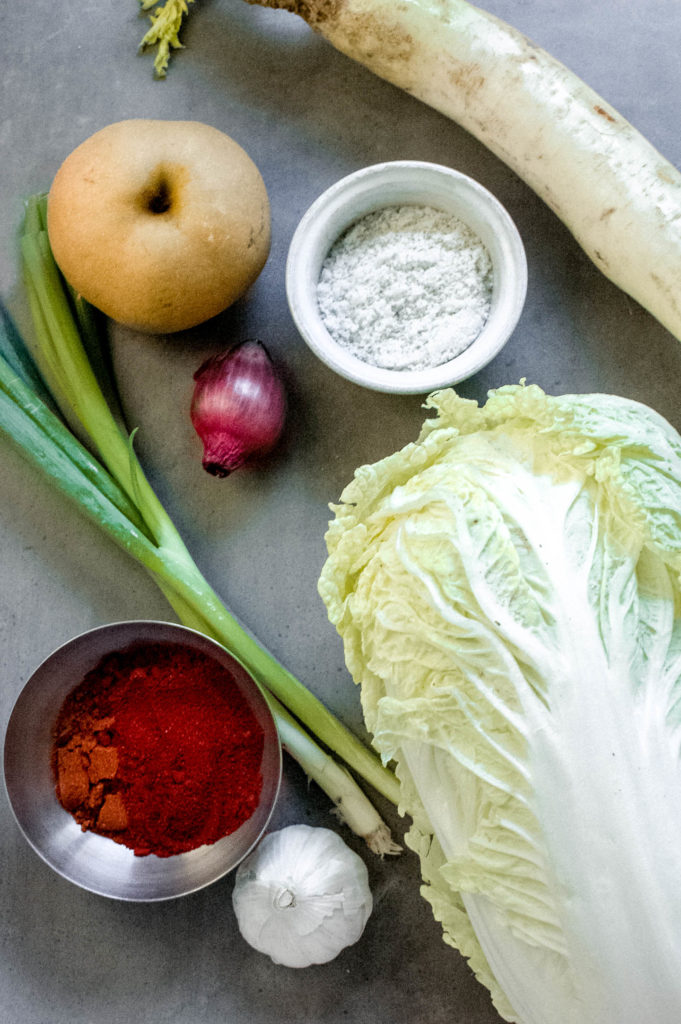
- 1 organic napa cabbage, sliced into shreds about 1/2-1 inch wide (about 2 lbs total. Savoy, green, or any other variety works, too)
- 1 medium organic daikon radish, sliced into matchsticks (about 1/2 cup)
- 1 organic medium carrot, grated (about 1/2 cup)
- 6 cups filtered water + 2 tbsp, divided
- 1/4 cup sea salt or other non-iodized salt (iodine is a beneficial mineral but it will inhibit the fermentation process in this recipe) + 1 tbsp, divided
- 3-5 organic scallions, cut into diagonal pieces
- 3 tbsp organic gochugaru (Korean red pepper flakes) OR 1 tbsp organic cayenne with 2 tbsp organic paprika
- 1 medium organic sweet apple, sliced into wedges
- 1 small organic onion or shallot, finely chopped
- 1/4 cup organic ginger, roughly chopped
- 2 cloves organic garlic
Instructions
- In a large salad bowl, dissolve salt in warm filtered water. Add the shredded cabbage, carrot and daikon. Let stand for 3-4 hours.
- Meanwhile, make the hot chili paste. In a food processor or blender, combine apple, onion, ginger, garlic, gochugaru/cayenne/paprika, and 2 tbsp of water. Reduce to a fine paste and set aside.
- Once the cabbage mixture has finished soaking, drain the water while reserving 1/2 cup. Rinse the cabbage mixture with filtered water to remove excess salt, then drain again. Add the remaining 1 tbsp of sea salt along with the 1/2 cup of water and mix the vegetable mixture thoroughly with your hands to combine, about 3-5 minutes or until it shrinks a bit.
- Add the hot chili paste and scallions, then thoroughly combine it with the vegetables. Mix it with your hands while wearing gloves to avoid burning from the peppers, or use a silicone spatula or spoon.
- Pack the wilted kimchi into large jars that have already been sterilized. Use hands to press down the mixture and eliminate air bubbles from the container. It must be covered in its own water. Leave 1 inch of space or more at the top of the jar to allow space for the air and gases. Top the mixture with the remaining juices from the bowl.
- Place lid on top without sealing it airtight, and cover with a weight.
- Place the jars of kimchi in a larger container or deep dish to collect any liquid that may run out during fermentation. Let the kimchi sit in a cool, dark place out of direct sunlight at room temperature, about 24-36 hours with at least a little air circulation. (I like to place it in the kitchen cupboard.)
- After 3-4 days, open the lid and pack the mixture down with a clean spoon. You can taste test it at this point.
- Store kimchi in the fridge to slow down fermentation once you're happy with the taste.
Notes
- Keeps 6 months in the refrigerator in an airtight glass container after it has done fermenting.
- Use clean equipment, never made out of plastic. To easily sterilize equipment, I like to boil a kettle of filtered water and carefully pour some into my mixing bowl and mason jar after they’ve first been washed with a non-toxic dish detergent such as Dr. Bronner’s (affiliate link). Then I quickly swish it around so the hot water eventually covers the whole inner surface area and removes any bad bacteria that may come into contact with the kimchi and disrupt the fermentation process. After this, I transfer the water to another glass or bowl to reuse for other recipes, make a tea, or to water plants, and avoid wasting the water.
- Add organic local miso and tamari to your pepper paste for a burst of umami flavour, if you like. 1 tbsp of each will suffice for this recipe.
- Use wild caught fermented fish or shrimp if you choose to try it in this recipe and if you can access it.
- Simply scrape off any yeast or mold on the surface if it develops, as the rest of the batch should be fine to eat. You’ll know if it has gone bad, it should taste acidic but not like it has rotted.
- Wear gloves if touching the pepper paste with your bare hands. If you use your bare hands before touching your face or eyes it will burn! I usually just stir the mixture thoroughly using a silicone spatula.